Tips for Making Homemade Ice Cream Without a Machine
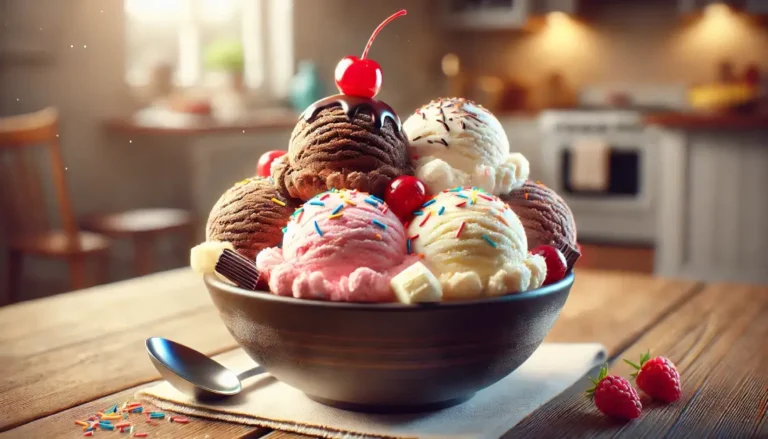
Homemade ice cream is one of life’s simple pleasures. But what if you don’t have an ice cream maker? The good news is that you don’t need one to create delicious, creamy ice cream at home.
With a few tools and the right ingredients, you can whip up your favorite frozen treat right from your kitchen — no machine required.
In this guide, we’ll explore tips, techniques, and easy recipes that will help you master the art of making ice cream by hand. Whether you’re craving classic vanilla or adventurous flavor combinations, you’re in the right place.
Why Make Ice Cream Without a Machine?
Not everyone has space for another kitchen gadget. Ice cream makers can be expensive or simply unnecessary if you only plan to make ice cream occasionally. Making it by hand not only saves money, but also allows you to fully control the ingredients, flavors, and textures.
This method is also fun — it’s a great activity to do with kids or friends. And the satisfaction of eating ice cream that you made yourself is unbeatable.
Basic Tools and Ingredients You’ll Need
Before you start, gather the following tools and ingredients to make the process smoother:
Tools:
-
Large mixing bowl
-
Hand mixer or whisk
-
Spatula
-
Freezer-safe container with lid
-
Optional: Blender or food processor
Core Ingredients:
-
Heavy cream (or whipping cream)
-
Sweetened condensed milk
-
Vanilla extract (or other flavorings)
-
Add-ins: fruits, chocolate chips, nuts, cookies, etc.
These ingredients form the base of a no-churn ice cream recipe — a method loved by home cooks for its simplicity.
The Classic No-Churn Ice Cream Method
The easiest and most foolproof way to make ice cream without a machine is the no-churn method. Here’s how it works:
Step-by-Step Instructions:
-
Whip the Cream
Use a hand mixer to whip 2 cups of heavy cream until stiff peaks form. This adds air to your mixture, giving the ice cream its creamy texture. -
Mix Sweetened Condensed Milk and Flavorings
In a separate bowl, mix 1 can (14 oz) of sweetened condensed milk with 1–2 teaspoons of vanilla extract. You can also add cocoa powder, fruit puree, or other flavors here. -
Fold the Mixtures Together
Gently fold the whipped cream into the condensed milk mixture using a spatula. Don’t stir too hard — the goal is to keep as much air in the mixture as possible. -
Add Your Favorite Mix-ins
Now’s the time to add chopped cookies, chocolate chips, nuts, or swirls of jam. Fold them in gently. -
Freeze
Pour the mixture into a freezer-safe container. Smooth the top, cover, and freeze for at least 6 hours — overnight is best. -
Scoop and Enjoy
Let it sit at room temperature for 5–10 minutes before scooping if it’s too hard.
Pro Tips for Creamier Results
Even without a machine, you can get incredibly smooth and creamy ice cream if you follow a few expert tips:
1. Use Full-Fat Ingredients
Low-fat milk or cream alternatives might freeze into ice crystals, resulting in a gritty texture. For best results, stick to full-fat dairy.
2. Add a Spoonful of Alcohol
Adding a tablespoon of vodka, rum, or liqueur lowers the freezing point and helps prevent the ice cream from becoming too icy.
3. Don’t Overmix
Overmixing can deflate the whipped cream, resulting in a denser texture. Fold gently and patiently.
4. Cover Tightly
Use an airtight container or wrap with plastic film directly on the surface of the ice cream to avoid freezer burn and crystallization.
5. Freeze Quickly
Place the container in the coldest part of your freezer. A quicker freeze reduces ice crystals.
Flavor Ideas to Try at Home
Here are some exciting no-machine ice cream flavors you can create using the same base method:
Cookies and Cream
Add crushed chocolate sandwich cookies to the mixture before freezing.
Strawberry Swirl
Blend fresh strawberries with sugar to make a jammy puree. Swirl it into the base before freezing.
Mocha Madness
Mix in a tablespoon of instant coffee and cocoa powder for a bold, rich flavor.
Tropical Paradise
Stir in pineapple chunks, shredded coconut, and a dash of coconut extract.
Peanut Butter Fudge
Add swirls of peanut butter and chocolate fudge sauce for a decadent treat.
Vegan and Dairy-Free Options
No dairy? No problem. You can still enjoy homemade ice cream with a few simple swaps.
Coconut Cream Base:
-
Use canned coconut cream instead of heavy cream.
-
Mix with sweetened condensed coconut milk (or make your own with coconut milk and sugar).
Banana Ice Cream:
-
Blend frozen bananas until smooth.
-
Add cocoa powder, peanut butter, or frozen berries for flavor.
These alternatives are naturally sweet and creamy, perfect for anyone avoiding dairy.
Storing and Serving Homemade Ice Cream
Homemade ice cream is best enjoyed within 1–2 weeks, as it doesn’t contain preservatives like store-bought versions. Here are some tips for storing and serving:
-
Use shallow containers for faster freezing and easier scooping.
-
Let the ice cream sit out for 5 minutes before serving.
-
If it gets too hard, microwave it for 10–15 seconds to soften slightly.
When Things Go Wrong: Common Mistakes and Fixes
Even simple recipes can go sideways sometimes. Here are common problems and how to fix them:
Ice Crystals Forming:
-
Cause: Too much water in ingredients or slow freezing.
-
Fix: Use creamier ingredients and place the container in the coldest part of the freezer.
Too Hard to Scoop:
-
Cause: Not enough fat or sugar, or freezing too long.
-
Fix: Add a small amount of alcohol or more cream in future batches.
Gritty Texture:
-
Cause: Overmixing or not folding gently.
-
Fix: Whip cream properly and fold slowly with a spatula.
Final Thoughts: Homemade Delight Without the Hassle
Making ice cream at home without a machine is not only doable — it’s incredibly rewarding. With just a few ingredients and some creativity, you can whip up treats that rival anything from the store.
From classic vanilla to wild flavor combos, your freezer can become an ice cream parlor in no time. So grab your bowl, start whipping, and get ready to indulge in sweet, homemade happiness.


